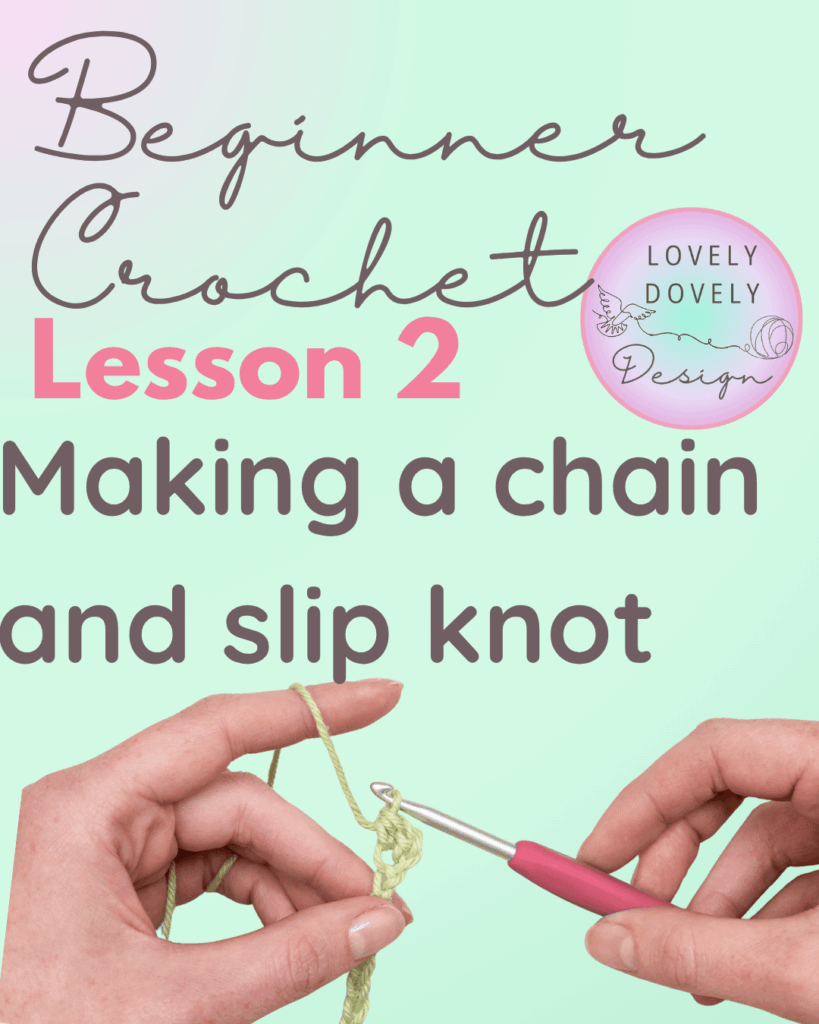
Lesson 2: How to Make a Slip Knot and Chain Stitch
Hello Lovely!
You’re doing so well. Now that you’re comfortable holding your hook and yarn, it’s time to learn your very first stitches — the slip knot and the chain stitch. These two are the foundation for nearly every crochet project you’ll ever make. 🌸
What You’ll Need
- Your yarn and crochet hook from Lesson 1
- Scissors
- A comfortable, well-lit space
Step 1: Make a Slip Knot
The slip knot is how you attach your yarn to your hook. It’s the first loop that begins your crochet journey.
- Hold the end of your yarn (the tail) in your left hand.
- Wrap the yarn over your fingers to make a loop.
- Pull the working yarn (the strand connected to the yarn ball) through the loop using your fingers or the hook.
- Tighten both ends gently to form a knot that slides easily on your hook.
Step 2: Crochet the Chain Stitch
The chain stitch (abbreviated “ch”) creates the base for almost every crochet pattern.
- Hold your hook with the slip knot on it in your right hand.
- With your left hand, hold the yarn a few inches from the hook to guide it.
- Wrap the yarn over the hook from back to front — this is called a yarn-over.
- Pull the yarn through the loop already on your hook — you’ve made one chain stitch!
- Repeat this motion to make a row of even chains.
Practice Exercise
Try making 15–20 chain stitches in a row. Focus on keeping your tension even. When you’re done, gently stretch your chain — it should look neat and even, not too tight or twisted.
Next Lesson
Once you’ve mastered the slip knot and chain stitch, you’re ready for your first real stitch — the single crochet! It’s the stitch that turns chains into fabric.
Thanks Lovely, and happy crocheting!
Love Claire x
Hello Lovely, I hope you found this written tutorial helpful. To watch the accompanying video tutorial, click below.